Rollover Menu
NeoFreaks News
![]()
Step 3:
Now that we’ve done that we need to create the actual menu
selections. I’m going to add currently existing WebPages to my menu
– if it for your own site I suggest you use your own website pages.
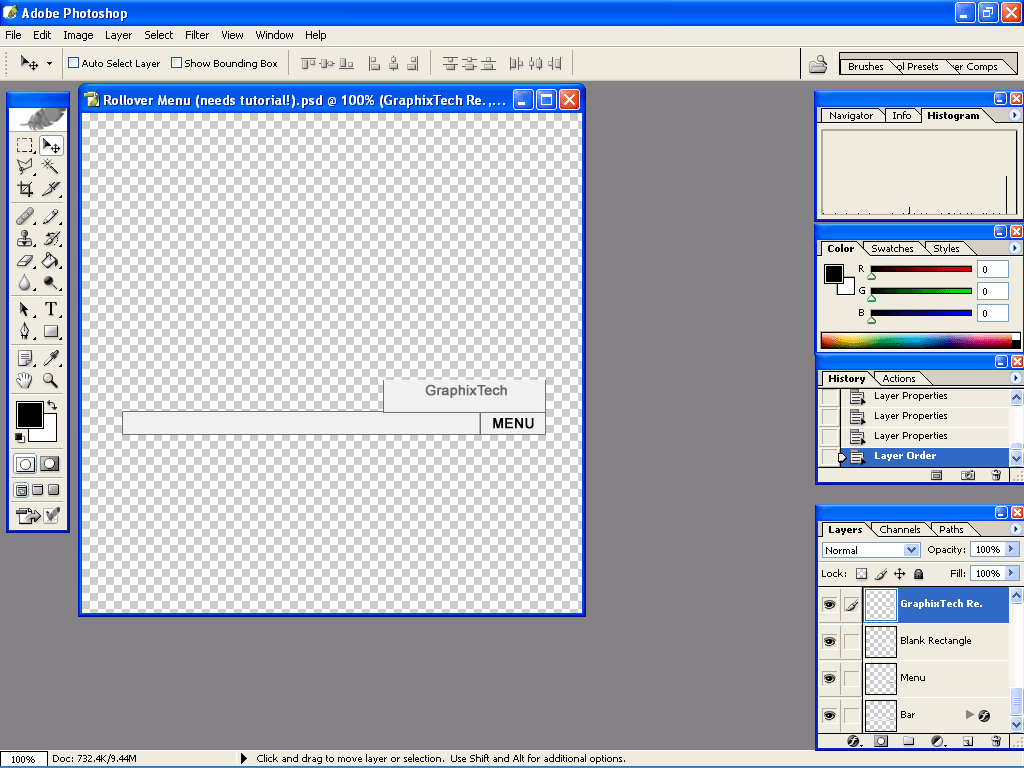
Like before, create a new layer and select the Rectangular Marquee
Tool and draw a rectangle and fill it in with your desired colour
then duplicate it. (this is for the first link in your menu). Select
the text tool and add some text to the rectangle and join the layers
(link number 1’s name). Make sure you have one rectangle without
text! It should look like something like this:
Click Here
Step 4:
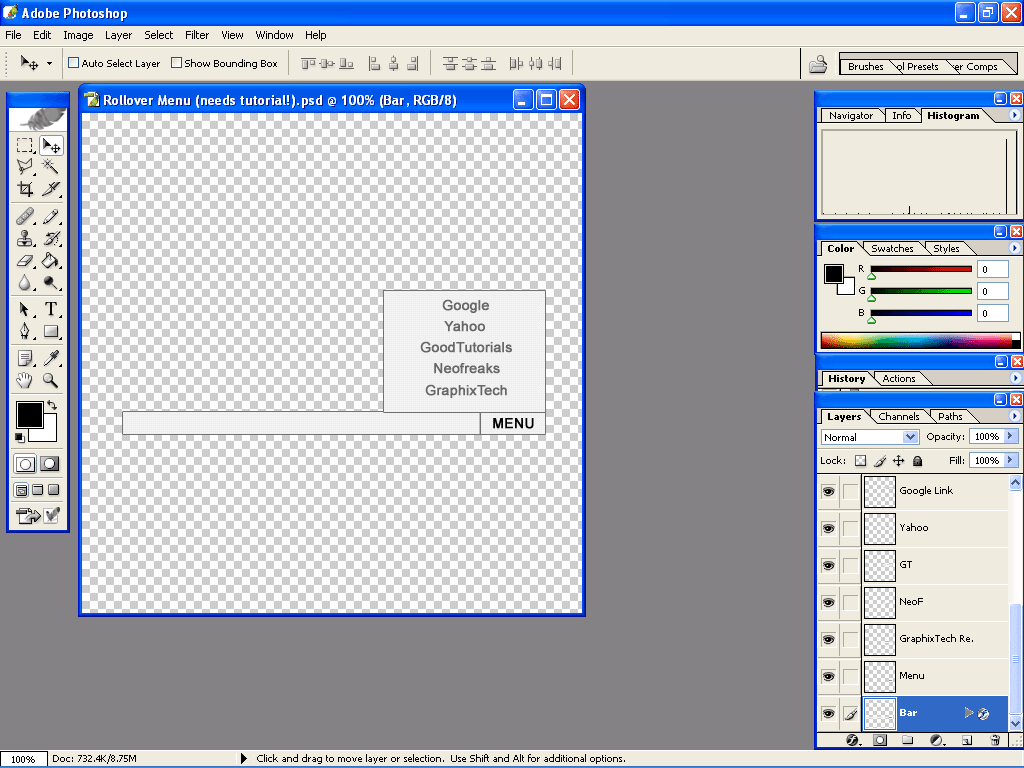
Unfortunately I stuffed mine up and way stupid enough to make my
links uneven, so the images might not match what I’m saying
completely. But don’t worry – it won’t make it anymore confusing!
You’ll make a good version. Now, with that Duplicated rectangle
duplicate it again. Use the first duplicated rectangle and write
another link on it then join the layers. This time move this
link/button above the first link/button so it is in a straight 90
degree angle going vertical (upwards). Continue this process of
duplicating until you have all the links you want.
(Note: Once u reach the last link you don’t need to duplicate the
rectangle).
This was my result with all of my links:
Click Here
NeoFreaks back
Online!
Click
here
to visit
Revealing of
Lv II
... Part One
What is Lv II you ask? Click
here!
Are you a NeoFreaks member and want to advertise your site? PM tha_myster for more information.